

How To Choose The Right Manual Knife Sharpeners
Choosing a manual knife sharpener is less about buying the most aggressive abrasive and more about matching edge control to the knife in front of you. A thin Japanese kitchen blade, a thick hunting knife, a folding EDC knife, and a hard-use bushcraft blade all respond differently to sharpening pressure, bevel angle, and finish.
Quick Answer
For the most control, use a whetstone; it can establish or repair a bevel, but it requires practice to hold a consistent angle. A guided manual sharpener is easier for repeatable maintenance, especially when the knife already has a defined bevel. Choose the abrasive by condition: coarse grit for damage and reprofiling, medium grit for routine sharpening, and fine grit or a strop for refining an already sharp edge.
Table of Contents
Our Top Picks
Affiliate disclosure: if you buy through these links, we may earn a commission at no extra cost to you.
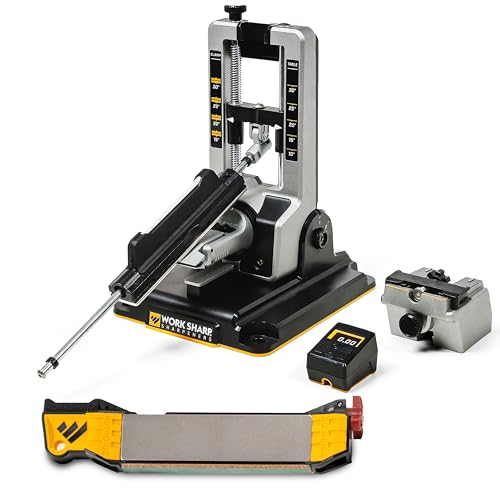


Match the Sharpener to the Knife and the Job
Manual sharpeners generally fall into two useful categories: freehand abrasives, such as whetstones, and guided systems that help hold the blade at a repeatable angle. A whetstone gives the broadest control over bevel shape, edge thickness, and finishing level. That makes it suitable for repairing a damaged hunting knife, changing the geometry of a bushcraft knife, or refining a kitchen knife, but the result depends on your ability to keep the blade angle steady.
A guided manual sharpener is more forgiving for routine maintenance. Its main advantage is not that it removes steel more intelligently; it is that it helps the user reproduce the same angle from one sharpening session to the next. This is particularly useful for folding knives and EDC knives, where a consistent bevel makes touch-ups predictable. It can also be practical for a tactical knife that needs a serviceable working edge rather than a highly polished finish.
First decide whether the edge needs honing, sharpening, or repair. Honing realigns an existing edge without substantially removing steel. Sharpening removes metal to create a new edge. A rolled edge may respond to light honing, while a chipped, blunt, or uneven edge needs an abrasive that can re-establish the bevel.
Understand Grit, Abrasive Type, and Edge Finish
Whetstone grit determines how quickly the abrasive removes steel and how refined the resulting scratch pattern becomes. The Ultimate Precision Edge Knife Sharpening Guide (2026) describes coarse abrasives in the 100-400 grit range as appropriate for damaged edges, reprofiling, and severely dull knives. These grits are useful on a thick fixed blade or neglected hunting knife, but they can remove material quickly if used with unnecessary pressure.
An 800-1200 grit stone is generally the practical range for routine sharpening. It is coarse enough to create a functional apex without making the process excessively slow, yet fine enough for many everyday cutting tasks. For a kitchen knife, a finish around 1000-grit diamond can provide strong cutting performance while keeping future touch-ups straightforward, according to the Ultimate Precision Edge Knife Sharpening Guide (2026).
Fine stones from approximately 3000-6000 grit refine and polish the edge. Stones above 8000 grit can produce extra-fine refinement for users who specifically want a mirror-polished edge. That finish is not automatically better for every knife. A working bushcraft knife often benefits more from a clean, durable toothy edge than from extensive polishing, while a slicing-focused kitchen knife may reward additional refinement.
Diamond abrasives can be convenient for manual maintenance because they cut efficiently and are available in compact guided formats. Water stones offer highly controllable sharpening results, but KnivesReview notes that water stones may require soaking for approximately five to ten minutes before use, depending on the stone. Follow the instructions for the specific abrasive rather than assuming every stone should be treated the same way.
Set the Correct Bevel Angle
Angle consistency matters more than choosing a premium abrasive. A controlled angle creates an even bevel and a predictable cutting edge; an inconsistent angle produces a rounded or irregular apex that may feel sharp in one spot and dull in another.
The appropriate angle depends on blade construction, steel, and use. The Ultimate Precision Edge Knife Sharpening Guide (2026) gives approximately 15 degrees per side as a common starting point for many Japanese knives and harder steels, while approximately 20 degrees per side is common for many German-style and standard stainless-steel knives. These are working references, not universal laws.
A thin kitchen knife intended for precise slicing can usually support a more acute edge than a thick hunting or bushcraft knife used against tougher materials. A folding EDC knife may need a compromise between slicing ability and resistance to edge damage. On a hard-use tactical or field knife, a slightly wider edge can be preferable if the knife is exposed to twisting, rough material, or occasional contact with harder objects.
Blade thickness and grind also influence the result. A full-flat grind may feel thin behind the edge, while a saber or convex grind can leave more steel supporting the apex. Sharpening should preserve the intended geometry rather than forcing every knife into the same bevel profile. If an edge chips or dulls unusually quickly, reduce pressure and consider increasing the edge angle by approximately 2-5 degrees, as recommended in the Ultimate Precision Edge Knife Sharpening Guide (2026).
Use a Controlled Sharpening Sequence
Secure the sharpener on a stable surface and clean the blade before beginning. Place the knife at the chosen angle and use light, controlled strokes that follow the existing bevel. Heavy pressure can remove more steel than necessary and makes it harder to maintain a consistent angle, particularly on softer stainless steels or thin kitchen blades.
Work one side until you raise a burr along the length of the opposite side. The burr is a small strip of displaced metal at the apex; feeling for it carefully with your fingertip moving away from the edge can help confirm that the abrasive has reached the full bevel. Do not drag a finger along the cutting edge. If the burr appears only near the heel or tip, continue working on the areas that have not yet reached the apex rather than immediately moving to a finer abrasive.
Once the bevel is established, repeat the process on the opposite side, then remove the burr with lighter alternating passes. The typical sequence is to establish the bevel, raise a burr, remove the burr, and optionally polish or strop the edge. A final strop can clean up remaining fine burr material, but it should not be used to compensate for an incompletely sharpened bevel.
A guided manual system is useful when you want repeatable maintenance without developing the same freehand technique required by a whetstone. Wicked Edge's Kitchen Knife Maintenance Made Simple: The Smart Sharpener's Guide to Always Sharp Knives recommends establishing initial edge geometry on a bench sharpening system and maintaining it with a handheld guided sharpener. The underlying principle is sound: do the major geometry work deliberately, then use lighter maintenance sessions to preserve it.
Maintain Different Knife Types Without Over-Sharpening
Hunting knives and fixed blade knives usually need a durable, even apex that can handle hide, meat, cordage, and general camp work. Avoid chasing a mirror finish if the knife's main job is controlled field cutting. A medium finish with a clean burr removal often provides a useful balance of bite and durability. Wipe and dry the blade afterward, especially when the knife has been used around moisture or food.
Bushcraft knives benefit from attention to edge geometry as much as sharpness. The edge should be supported by enough steel for the intended work, and the sharpening process should respect the knife's grind. A convex or otherwise reinforced edge should not be aggressively hollowed or made excessively acute just to achieve a quick shaving test.
Folding knives and pocket knives are often maintained in shorter sessions because their blades are carried frequently and used for light cutting. A guided sharpener can help preserve the existing bevel, while a fine diamond abrasive or medium stone is usually more appropriate than repeatedly reaching for a coarse repair grit. Keep the tip controlled; lifting it carelessly at the end of a stroke can create an uneven point.
Kitchen knives require clean equipment and a consistent angle because their thin edges reveal mistakes quickly. KnivesReview commonly recommends honing about weekly for home cooks and daily for professional users, while full sharpening may be needed approximately every three to twelve months depending on use. Those intervals are starting points rather than rules: cutting board material, food types, technique, and storage all affect edge life. Never use a knife sheath as a substitute for sharpening discipline; a sheath protects the blade during storage or carry, but it does not prevent edge wear.
Frequently Asked Questions
Are whetstones better than guided manual sharpeners?
Neither is universally better. Whetstones provide more control over bevel geometry and edge finish, while guided sharpeners make it easier to repeat a consistent angle. Choose the method you can use accurately and safely.
What grit should I use for a dull pocket knife?
For a normally dull pocket knife, begin around 800-1200 grit. Use a 100-400 grit abrasive only when the edge is damaged, severely dull, or needs reprofiling.
What sharpening angle is right for a hunting knife?
A hunting knife often benefits from a durable angle near 20 degrees per side, but the correct choice depends on its steel, thickness, grind, and workload. Preserve the existing bevel when possible rather than imposing an arbitrary angle.
How do I know when I have sharpened enough?
Work until the abrasive reaches the apex along the needed portion of the edge and a burr forms on the opposite side. Then switch sides, remove the burr with lighter alternating passes, and check the edge by cutting appropriate material rather than relying only on a visual shine.
Can I use a fine stone on a chipped knife?
A fine stone is inefficient for significant chips because it removes material slowly. Establish a new edge with a suitable coarse or medium abrasive first, then use the fine stone only to refine the repaired bevel.
Why does my knife become dull immediately after sharpening?
Possible causes include an incompletely removed burr, excessive sharpening pressure, an edge angle that is too acute for the work, or cutting contact with hard surfaces. Reduce pressure, verify that the burr is gone, and consider widening the angle slightly for hard-use knives.
The right manual sharpener is the one that lets you create and maintain a consistent bevel without removing unnecessary steel. Use a whetstone when you need maximum control, a guided system when repeatability matters most, and an abrasive grit suited to the condition of the edge. Start by inspecting one knife in your collection, identify whether it needs honing, routine sharpening, or repair, and complete a slow, angle-controlled session before choosing a more aggressive sharpening routine.


